Showing posts with label Thank You. Show all posts

Wednesday, May 15, 2019

Saying Thank You


Last weekend, some of my friends make it possible for me to go to the Great Lakes Scrapbooking Mega Meet held in Novi, MI each year. They arranged for Don's sister to spend the day with him so that I could go. It is always so much fun to see and experience the new things that are on the market.

This was my "thank you" card that I made for my sister-in-law who spent the day with Don. The  two of them had a good time together. It is very similar to the card that I made for my last card class. I sponged a very light oval onto the white card stock (using Primrose Petal ink) which I used as a guide for doing my stamping. I used peg stamps from Rubber Stamp Tapestry.


Saturday, March 23, 2019

Today's Class

This morning I had the March "Create, Challenge, Encourage" Stamp Class. We had a great time together. These ladies are such an encouragement to me. I was sorry to tell them that the April class will be our last one. I am finding it harder and harder to be creative as my husband's battle with Parkinson's Disease continues. The first card was posted on March 7. Another card needs some extra pictures. So that leaves two.

On this first card, I wanted to highlight the new Sale-A-Bration embossing folder called "Country Floral". This folder is beautiful. A small piece of card stock was embossed and added to a white card base. The accent color used was Lost Lagoon. The sentiment and heart was from the set "Ribbon Of Courage." I sponged on a little ink in order to accent some of the flowers.


I ended up making two samples of the next card. The first one was made using Lost Lagoon ink and card stock. But not wanting to make two cards using the same color I chose the color Sweet Sugarplum.

This is called "RetiForm Technique". It has been around for sometime. You basically section off different  parts of the card stock, sponge on your ink choice and then stamp the images in that section. It might have been better if we had used a darker shade of ink. I still like the cards this way.

I chose two stamps sets "Touches of Texture" and "Painted Seasons". I thought these two sets worked well together.


Sunday, June 24, 2018

Summer Has Begun

Yes, summer has arrived in Michigan. We have already had a few 90 degree days, a few days in the upper 60's and lots of rain.

Parkinson's Disease continues to be a part of our lives. Sometimes it just gets in the way of my card making and postings, but that is just the way life is for now.

Last week, I made three cards for a class I had on Saturday morning. The cards were simple but well liked by the ladies who attended the class.

The first two cards were made using the Designer Series Paper from this past Sale-a-Bration. I saw so many beautiful cards posted on Pinterest. I had to see if coloring on the paper with water based markers really worked. "It did!" On the first card, I used a long time retired color called "Pale Plum". I only have the marker and a few sheets of the cardstock left. It has always been a favorite color of mine.


For the second card I used the color "Pool Party". Love that color. I used the marker and cardstock in that color.


 I also offered the card made with the color "Coastal Cabana". That was probably my favorite, but I didn't get a picture of a finished card in that color. The medallion was made with a scalloped circle and a die from the new framelet set called "Stitched Labels". The first stamp came from the new set "Stitched All Around" and the birthday greeting was a "Our Daily Bread Designs" stamp.


Wednesday, September 13, 2017

Eight-Point Quilt Block

I finally got a chance to try out the new "Quilt Builder Framelites Dies" this evening. I am so excited about the possibilities. I cut out four sets in four different colors then I re-assembled the pieces in different color combinations. Here is a picture of my finished card. Of course I had to add in some black. Pink with black is one of my favorite color combinations.

The four colors I used were black, Pink Pirouette, Rose Red and a pink I found that was just a little bit darker than Pretty In Pink. I created several layers which I really love. The sentiment is  from a retired set called "Three Little Words".  So perfect for what I wanted to do. The words on the inside say "thanks so much".


I  put together two other pieces. Just don't have the cards finished yet. Love how there are so many ways to put the quilt blocks back together. Each one becomes so unique.


Love the saying that comes with the coordinating stamp set "Christmas Quilt"--

When life gives you scraps,
make a quilt.

Monday, September 11, 2017

CAS446 -- "Mad for Plaid"

"Mad for Plaid" was today's CAS challenge. So many ideas started going through my head. I started to do a navy and white color combination but that idea changed quickly when I saw this paper. I had purchased the Coordination paper at JoAnn's just a couple of weeks ago. I believe there were four different designs per color. I wanted to see what I could do with it.

Pool Party card stock went well with the designer paper. I used a very simple design because I wanted the paper to stand out. To make the daisy, I used the Stampin' Up set "Delightful Daisy", Pool Party ink to stamp the flower and the coordinating punch to cut it out. I found some enamel dots that were a good match so I used them to add a little accent.


Weekly Favorite for week ending Sept 16, 2017


Wednesday, August 9, 2017

A Special Thank You

I wanted to say thank you for the Stampin' Up orders I received last month. This is the note card I made and put in with their orders. I love the stamp set "Best Birds" and the coordinating dies. I also really like the retired In Color Crisp Cantaloupe with black. I guess I like most any color with black.
The words are from Spellbinders. I stamped the little flowers and used the matching die to cut them out. I should also mention that the size of the card is 4 1/4" x 4 1/4". To make the envelope, I use 24# copy paper, cut a square at 7" x 7" and score at 3 1/2" using my envelope punch board. That gives me the perfect size envelope for this size card.


I used stamps from the set "Colorful Seasons" to decorate the inside.


My prayer is that you will have a beautiful day!

Tuesday, July 18, 2017

This Little Piggy

What a fun stamp set! I loved this stamp set when I began seeing cards made with it. I got the set last month but had not been able to get inspired to use it. Yesterday was the "day". This is my card.

I have been looking at cards that are made with unique folders. There are so many. Yesterday I ran across a video showing how to make the "squash fold" card. I had done this fold years ago but had forgotten about it.This video sparked the inspiration I needed. "Here is the a link" to the video.

Here is the card that I made. The finished size of the card is a 4 1/4" x 4 1/4" square card. The card base is Stampin Up's "Lucky Limeade" accented with Calypso Coral and Island Indigo. I stamped my little piggy onto 90 lb. watercolor paper with VersaFine Black Onyx ink and heat embossed it using clear embossing powder. I used the Stampin' Up watercolor pencils and my aqua brush to color the image.


Such cute stamps.


Saturday, June 24, 2017

New Dies

This is my first card using the new die set from Stampin' Up called "Eastern Medallions Thinlets". I used a white card base and the top layer is Lost Lagoon card stock from Stampin' Up. I am already convinced that these are going to be fun and interesting dies to use.


Friday, May 19, 2017

Sunburst

I was having trouble getting started making some cards that I really needed. I searched Pinterest for what seemed like hours. I came across this one card. I had the exact designer paper and the exact stamp set. So I decided to try CASE'ing the card just as Angela Westland had made her card. The link to her card is HERE.

Here is my card. The "Floral Boutique" designer series paper is so pretty. I love the Night of Navy color with the white. The sentiment is from the "Floral Phrases" stamp set.


Making this card was just what I needed. I began going through my box of scraps and ended up making two more cards.


After doing these cards I was able to get some more cards made for my class coming up next week.


Saturday, May 13, 2017

Updated Post

I was doing some updating and editing of my blog and found that this post had never been finished. It was still in the draft mode. I decided that it was time to finish it or delete it. I really like this card so it is time to "finish" what I had started. I made this card some time ago basically using a piece of SU designer paper. The paper has some of my favorite colors and "flowers". I love the delicate feel of the paper and the design. The "thank you" sentiment is from a Unity Stamp Co. set called "Butterflies and Sunbeams," the August 2015 Sentiment Kit. The little flowers are from the SU set "Petite Petals".


Thank you for taking the time to visit my blog and letting me share my love of card making with you today.

Thursday, April 6, 2017

A Couple of Special Cards

I was just looking over some of my pictures taken in March. I found two cards that I had not posted. The first one was for my daughter's birthday. We had been traveling the first of March and got back home the day before her birthday. It took me about a week to get her card made. It was a little too late to say "Happy Birthday"; I had talked with her by phone on her special day. When I saw this sentiment, I knew that it was what I wanted to add to her card. Purple was always her favorite color when she was in high school. I came across the purple card base and the white embossed panel. I heat embossed the sentiment using white detailed embossing powder. After cutting the leaves with one of my dies, I used some punches to make the flowers. I am truly thankful for Angela; she is a very special daughter.


This was a thank you card even though it does not have any "words" on the front. I made the front panel a long time ago when I was doing some watercolored background washes. It had been in a scrap box for many months just waiting to be used. The rose is a Penny Black stamp that I had colored with markers, spritzed with water and stamped. It made the perfect card when I was in a hurry and needed to get the card done. What do you have lying in your scrap box just waiting to be used?


Tuesday, March 7, 2017

Flowers Are Mine

Sometimes I look around my desk and wonder why I don't just throw everything laying around in the wastebasket. Then I make a card with some of those things. That's why I cannot seem to throw away those extra flowers, leaves, die cuts, etc away. This is one of those cards. I needed a card for a special friend. Found the die cut in a small tray on the left side of my desk. The flowers were from the "flower drawer" and the leaves were from a small plastic box of "greenery". Often when I have a small scrap of card stock left, I will punch or die cut a flower or two. If it is green card stock, I will punch or die cut greenery until the scraps are so tiny that I can do nothing else with them. I have found that I like to have different shades of greenery on hand. When I am in the middle of making a card, I don't have to stop and cut the leaves.

I started out making this card with the idea that it would be a sympathy card. I had cut the large circle medallion months ago (from a Spellbinder's die). To keep the colors soft I used the same vanilla card stock that the circle was cut from. From the "flower drawer" I found the parts for the flowers which had been cut from SU island indigo card stock. Some parts had already been sponged with whisper white craft ink. The greenery was already cut. After laying everything out, I sponged a little island indigo ink onto the medallion so that it would show up better. I did not add a sentiment because I knew that I could use the card for many different occasions. 

I love flowers and I love putting them on my cards. I love springtime and I love seeing all the different flowers come to life after a winter of rest. 

"Take a good look at God's Wonders--
They'll take your breath away."
Psalm 66:5 (The Message)


Friday, February 17, 2017

Beautiful Paper

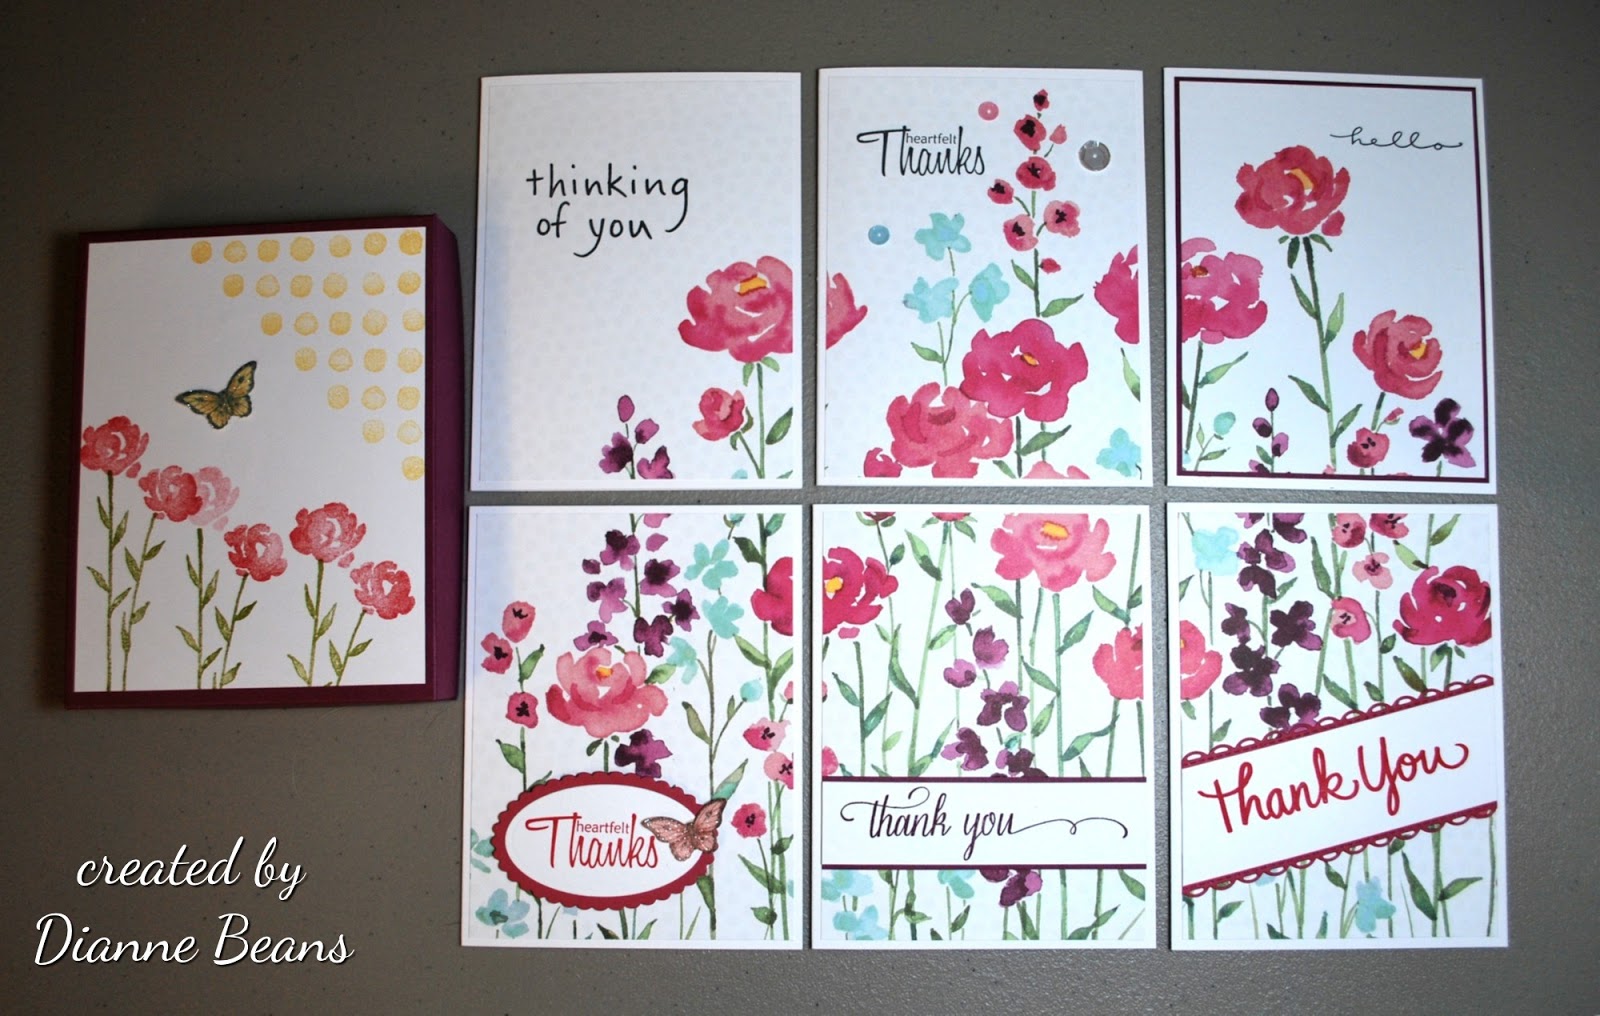
Just came across some pictures of a "thank you" card set I made about a year ago as a gift for a friend who was having surgery.I had this beautiful sheet of designer paper and I saw a card set made with the paper on Pinterest. It was the inspiration I needed to cut up that sheet of paper and make a set of six cards.


Monday, March 28, 2016

The Paper Players Sketch Challenge

Using this week's sketch challenge from The Paper Players blog, I made a "thank you" card. It took me most of the afternoon to decide what papers to use. I found these three Designer Series Papers in the box of scraps. They coordinated with SU's Rich Rassleberry card stock. I always love using this color. The flower was stamped using a flower from the SU "Mixed Bunch" set. The sentiment is from the Unity set called "Butterflies and Sunbeams".


Thank you for stopping by to visit my blog.

Wednesday, March 9, 2016

Bouquet of Tulips


I needed a thank you card last weekend. My husband and I had been invited to a "German dinner" at our friends home on Thursday evening. It was delicious. I had been working on examples for a class about watercoloring with markers. I chose one of the images to go on my card. Below the card is a list of what I used to color this image. Thank you for stopping by.

I am working on a post showing some of the images I have made, but that's for another day.


Stamps--Stampin' Up "Blessed Easter" and "Peaceful Petals"
Stamped on Canson 140# Watercolor paper with VersaFine Black Onyx ink and heat embossed with clear fine detailed powder
Flowers--Tombow #062 Pale Yellow and Ripe Persimmon Distress Marker
Leaves--Mowed Lawn Distress Marker
Background--Tombow # 491 Glacier Blue
Sentiment colored with Squeezed Lemonade and Ripe Persimmon Distress Markers


Tuesday, January 26, 2016

Clean and Simple -- My Style

On January 12, I posted a card for a challenge to use a flourish on your card. I loved the idea so much that I decided to try making another card which you see below. It is much the same except I splattered some ink over the design. That softened the white just a little which I really like.


Then I had the idea to try making a similar card using no dies or punches which you see below. The flourish stamp is from the SU set "Everything Eleanor" stamped with Pear Pizzazz ink. The flowers are from the same set stamped on two shades of orange card stock with Calypso Coral ink, then cut out by hand. This time I splattered the image with ink and cut it so that it could be mounted with a layer of black and then green card stock. I would have to say that this is my favorite.


Tuesday, January 12, 2016

Flourishes Challenge

I wanted to do a card for this week's "Less is More" challenge. The challenge was to make a one layer card with a flourish on it. I don't have many flourish stamps but I thought of this one Cheery Lyn Die that I have. I think it is called "Fanciful Flourish". I wanted to make it a part of the card so I cut it out and used the negative part as a stencil. Using Stampin' Up's Pear Pizzazz and Always Artichoke inks, I sponged the image onto the front of my card. The thank you stamp is from a long retired Stampin' Up set called "Heartfelt Thanks". Stamped it in the upper left corner using the Pear Pizzazz ink. I wanted to add a little something else and I found this flower. It was a flower from the SU set called "Secret Garden", stamped on a pastel colored card stock and embossed with white detail embossing powder. I glued it directly to the card front and it really feels a part of the card. I hope that my card would still be considered one layer. I often have leftover flowers from a project that I am working on. I have them in a little drawer, and, like today, I found just the flower that I wanted.


Wednesday, September 2, 2015

SC556

Finally found time to make a thank you card using today's sketch challenge at Splitcoast Stampers.


Stamps used -- Leaves from SU's " Crazy About You", flower from SU"s "Secret Garden" and sentiment from Unity Stamp Co.'s set called "Butterflies and Sunbeams".

Friday, August 7, 2015

Whispy Prairie # 2

It seems that it has been almost impossible to find time to create this week. Don and I have been trying to clean out closets and get rid of unused "things". This is a task I have been putting off for a long time. As his Parkinson's continues to progress, there are more and more things that he cannot do thus I have to step in and try to do "that" also.

I needed a thank you card, and since I had so much fun with "Whispy Prairie" last week, I decided that I wanted to try using it again. I stamped the image on watercolor paper with VersaFine Black Onyx ink, used clear embossing powder and my trusty heat gun to finish the process. I used distress markers and an aqua brush to do the coloring. I wanted to follow through with the square background from the stamped image. I do not have a background stamp with that design but I pulled out a piece of plastic canvas, applied some ink, laid my paper over the canvas, gently rubbed the card stock and you can see the result. Perfect (in my opinion). The card base was SU Pool Party card stock stamped with SU Pool Party ink. Loved the result.


This card has been posted to "Friends With Flair" Friday on the Unity Stamp Co. Blog.

Monday, June 29, 2015

For "Unity {be inspired} Challenge

I have been thinking about this challenge for weeks it seems like. Just didn't have any good ideas. I started working on it today and ended up with a card that meets the sketch challenge and also the color challenge.


I received an order of stamps last week so this was a good time to use them. The flowers are called "feel the joy" and colored with SU markers Crushed Curry and Old Olive. I used SU Night of Navy and Old Olive CS and Night of Navy ink to stamp the "Thank You" which is from the "Blossom Stackers" set. I added a piece of Crushed Curry ribbon and for the final  touch I did a little sponging with a stencil around the flowers.