Showing posts with label Stamp Club. Show all posts

Friday, October 26, 2018

Favorite Fall Colors

The card challenge for my stamp Club meeting on this Saturday, October 27, is to make a card using your favorite fall colors. This  is my card for the challenge. We will also be making it as one of our cards. 


Stamps -- from the Stampin' Up sets Labels to Love, Label Me Pretty and Painted Harvest
Card Stock -- Cajun Craze for the card base, Sahara Sand (band under the green burlap ribbon) and Very Vanilla for the other elements
Inks -- Always Artichoke, Close To Cocoa, More Mustard and Memento Potter's Clay
Accessories -- Green burlap ribbon, coordinating punch and enamel dots


Thursday, October 25, 2018

Just For Fun

This card is "just for fun". Send it to a child, grandchild or even for the love of your life (your husband). I have had this set for quite awhile but had not used it. I have been looking at cards made with it for some time. I fell in love with this little guy. So I gave it a try. It was so much fun.


Stamps -- Stampin' Up Painted Harvest, In the Meadow, Crazy About You and grass stamp from "Stamps By Judith"
Card stock -- White card stock and some scrapbook paper from my collection
Inks -- Stampin' Up Crumb Cake, Old Olive, Soft Sky and VersaFine Onyx Black


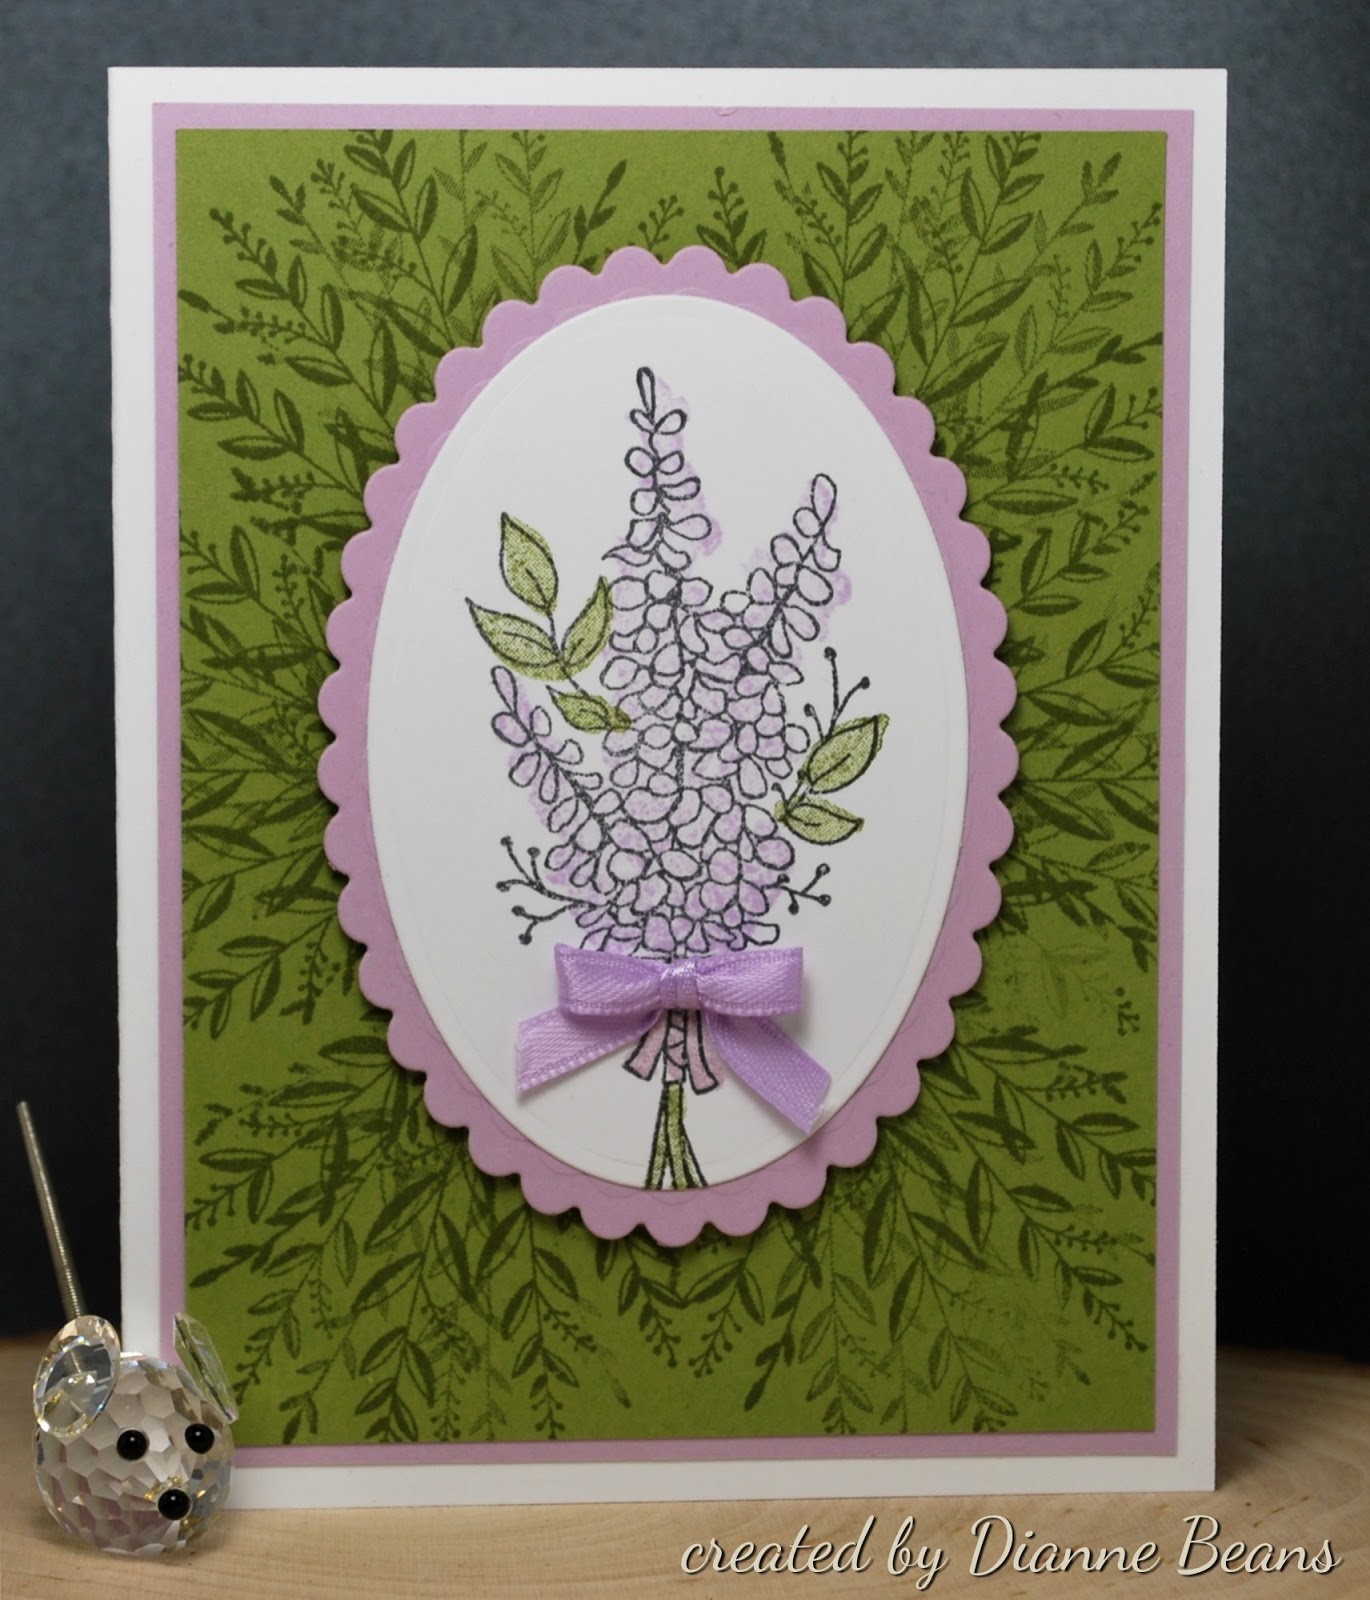
"Lots Of Lavender"

"Lots Of Lavender" is the stamp set I used to create the focal image for this card. It was a stamp set available for the 2018 Sale-A-Bration back in January, February and March. I have had it all this time and have not had a chance to use it. Love it.


Information on supplies used--
Stamps -- "Wishing You Well" and "Lots Of Lavender"
Card Stock -- White card base, Pale Plum and Old Olive
Inks -- Memento Tuxedo Black, Lulu Lavender and Stampin' Up's Old Olive
Dies -- Oval and scalloped Nestabilities from Spellbinders

To create the background, I used a piece of Old Olive card stock measuring 3 3/4" x 5".  Using the wheat stamp from "Wishing You Well", I stamped it 6 times using Old Olive ink.

Here is a link to the card that was my inspiration.


Wednesday, October 24, 2018

Inspiration

Where do you find inspiration? Sometimes I feel like I have no creativity. That's where I have been for sometime. When pressures of life press in around us, the ability to create can take a back seat. So often I have found "Pinterest" to be a help. At least it can give you a start.

As I was preparing for my upcoming class, I ran across a card that inspired me. As I was trying to CASE the sample, I had trouble. After trying several times with no success -- it finally came together.


This is a link to the card that was my inspiration.

The things I used--
Card Base -- Soft Suede card stock
Other card Stock -- Crumb Cake and Very Vanilla
Inks -- Soft Suede and Crumb Cake
Stamp Sets-- Country Home and Waterfront

I started by tracing an oval in the lower right hand corner.I know that it is hard to see in this picture but it is there.

Second, I placed my stamped images around that oval. 
 
Because I wanted to add a little texture to the background, I used a little stamp from the set called "Waterfront". Using crumb cake ink, I stamped off before adding it to on my card.

Finished card front.


Don't forget to decorate the inside of your card and the envelope. This is a wonderful stamp for doing that.


Monday, June 25, 2018

Two More

There were two other cards that we made on Saturday at our stamp club. In my travels around town, I had been seeing rows of beautiful colored Adirondack chairs setting in front of different hardware stores. Those chairs were my inspiration for this card. But--I did not want them sitting in front of a building; I wanted to see them on the shore of some lake.


Stamps -- Waterfront, High Tide and Sitting Pretty
Card Stock -- Crumb Cake, Soft Sky and white. The chairs were cut from scraps.
Inks -- Crumb Cake, Soft Sky and Smoky Slate
Accessories -- Pretty Park Framelits and Seasonal Layers Thinlets

For this second card, I used one of my new stamp and die sets.


Stamps -- Serene Garden
Cardstock -- Very Vanilla and Melon Mambo
Inks - Memento Tuxedo Black
Accesssories-- Die from Garden Scene Framelits and Copics to color the leaves


Sunday, June 24, 2018

Summer Has Begun

Yes, summer has arrived in Michigan. We have already had a few 90 degree days, a few days in the upper 60's and lots of rain.

Parkinson's Disease continues to be a part of our lives. Sometimes it just gets in the way of my card making and postings, but that is just the way life is for now.

Last week, I made three cards for a class I had on Saturday morning. The cards were simple but well liked by the ladies who attended the class.

The first two cards were made using the Designer Series Paper from this past Sale-a-Bration. I saw so many beautiful cards posted on Pinterest. I had to see if coloring on the paper with water based markers really worked. "It did!" On the first card, I used a long time retired color called "Pale Plum". I only have the marker and a few sheets of the cardstock left. It has always been a favorite color of mine.


For the second card I used the color "Pool Party". Love that color. I used the marker and cardstock in that color.


 I also offered the card made with the color "Coastal Cabana". That was probably my favorite, but I didn't get a picture of a finished card in that color. The medallion was made with a scalloped circle and a die from the new framelet set called "Stitched Labels". The first stamp came from the new set "Stitched All Around" and the birthday greeting was a "Our Daily Bread Designs" stamp.


Wednesday, May 16, 2018

Happy Father's Day

May is half gone so I was thinking about my upcoming card class. With June knocking on the door, I thought of "Father's Day" cards. I did not want to use brown or gray or dark blue. I wanted something bright and happy. The colors that jumped out at me were Soft Sky and Lost Lagoon. I didn't have any of the new designer paper so I made my own. I used Soft Sky card stock and ink. I think it made a beautiful background design. After stamping the sentiment on Soft Sky card stock using Lost Lagoon ink, I trimmed the words, cut them apart and used dimensionals to add them to the card. The candy dot was perfect to finish off the front.


I wanted to decorate the inside. I stamped the bottom of the white card stock using the top edge of the background stamp. Finally, using a ruler, I drew a line across the top of the stamped edge with the Lost Lagoon marker in one long smooth stroke. Love it.


Card Stock -- Soft Sky, Lost Lagoon and white
Stamps -- Just Rite Background Harlequin Script
                 Front Sentiment from Hero Arts
                 Inside sentiment from Stampin Up The Wildness Awaits
Ink -- Lost Lagoon
Accessories -- Candy Dot and Lost Lagoon marker

Blessed is those who fear the LORD,
Who find great delight in his commands.
They will have no fear of bad news;
Their hearts are steadfast,
Trusting in the LORD.
Psalm 112:1,7


Monday, May 14, 2018

Why So Difficult?

Why are masculine cards so difficult to create or is it just me? I spent all morning working on this card. I still feel that it is missing something. Not sure what! I will leave it for a while. I want to make at least one or two masculine cards in my next "Create, Challenge, Encourage" stamp club meeting. So I still have some work to do.


Stamps -- Stampin Up Hardwood, Country Livin' and Big On Birthdays
                 Impression Obsession background stamp Distressed Corduroy
Ink --  Memento Rich Cocoa
Card Stock -- Crumb Cake, Early Espresso and Very Vanilla 
Plus circle dies

Saturday, May 5, 2018

Inspiration And A "CASE"!

 After having a really busy week, going here, there and yonder, I needed some inspiration. I was looking on Pinterest to see if I could find something and I did. My card is just like the original. Here is a link to the original card by BJ Peters and her excellent video post "Passionate for Petal Palette". I really liked the added touch she used with the die cut. I am thinking to use this card in my next stamp class. Have fun watching her video.


From THE Heart

Tuesday, April 17, 2018

Another Card

This will be our third card for this month's CCE Stamp Club -- Create, Challenge, Encourage. It is made using several of the stamps from the set "Butterfly Basic" and a die from the "Butterflies Thinlets" set. All are being retired this year as of May 31. The inspiration for this card came from many posts on Pinterest.


 These pictures show the steps to the finished creation.


One of God's beautiful mysteries--
From Caterpillar to Butterfly


Getting Ready for Classes

Yesterday, I was trying to finish up my preparations for an upcoming class. I wanted to do a card for Mother's Day, but I also know that several in the class no longer have their mothers. So I wanted a card that could be used for other occasions. I think that this card works. 

For me, the challenge was finding the right Designer Series Paper. I feel that this is a little old fashioned but I love it. It reminds me of a dress my mother or grandmother would have worn. I also wanted a small design with a pretty accent color on the back. This piece of DSP is from Stampin' Up's "Botanical Garden" collection retired a number of years ago.

I love this fold. It is called the "Collar Fold". On this card, after finding the center on the DSP, I only cut down 1 3/4 inches. That allowed space for three "buttons".  The buttons were made using little scallop circles punched from Hello Honey card stock and topped with an enamel dot.

The card base is Mint Macaron card stock. The accent layer is Very Vanilla. I found that I had some Hello Honey ribbon which made the perfect bow. The sentiment is from the stamp set "Butterfly Basic" which is being retired this year. For the inside decoration I used a little "Cajun Craze" ink across the bottom for added interest.


Don't forget the inside


Saturday, March 24, 2018

CCE This Morning--Oh What Fun

CCE stands for "Create, Challenge, Encourage". This is my goal for each of our stamp club meetings. Some of the gals came Friday afternoon because they couldn't make it this morning. So much fun with each group.

We did three cards. Each one different; each one loved by all. With this first card, we were talking and learning about coloring with colored pencils and gamsol. I have had this rose stamp for many years and it is one that I love to color with my Prisma color pencils. There is so much detail but it is just large enough to be easy.


The second card used the Eclipse Technique. You can see the post I did a few days ago here for this card.


The third card used the stamp set called "High Tide". This was a CASE of another card I had seen on Pinterest. Everyone enjoyed working on the card. I look forward to doing some other cards with this set.


For our challenge we did a sketch challenge. How do card sketches work?  Here is my experience. I had all these pieces laying on my desk for several days. I just couldn't seem to get it together. When I looked at the sketch for our challenge, I saw how this card could be put together. It worked.


Our Sketch Challenge


Saturday, February 24, 2018

The Artist Rule of Three

Today at the meeting of our stamp club "Create, Challenge, Encourage", the challenge was to use the artist rule of three on our cards. I looked through some of my older cards and was surprised how often I have used "three" flowers, butterflies, squares, circles, etc. in my design. The card I made for today's challenge had the three pandas from the 2018 Sale-a-bration set called "Party Panda's". These little guys are so cute. I had to hand cut each one. It really didn't take very long at all. I found the designer series paper in my scrap box which coordinates with a long time retired card stock called "Bordering Blue". I still had a few sheets left which was perfect. I meant to cut all the circles using the smaller circle punch, but when I started, I picked up the wrong one which was larger. I didn't have another piece of designer series paper so I just made it work. When I got everything glued together, I loved the card. I still want to add a sentiment but not sure just yet if it will be "Happy Birthday" or "Thinking of you". I hope that these little pandas will make you smile when you see them.


Tuesday, February 20, 2018

My First

My first "waterfall card". I wanted to do something different. I looked and looked and looked. Since I had never done a waterfall card, I decided that would be my challenge. Watched several videos. WOW! There is so many talented card makers out there. My card is a combination of several ideas that I came across.

For my card, I chose Smoky Slate and So Saffron as my color combination. The card base is Smoky Slate and So Saffron is the accent color. I used the large flower stamp from the set "Indescribable Gift" to stamp the four little squares. To add some interest on the band that holds the waterfall strip, I used a die from the new thinlets set called "Petals and More". It wasn't quite long enough so I cut it in half and stretched it out a little. The break got covered up when the waterfall strip got glued onto the band.


This verse is from the new set called "Hold On To Hope".


Monday, February 19, 2018

A New Card

I was looking for ideas for my upcoming stamp club meeting coming this weekend. So many wonderful inspirations. This is the first card I chose. It is called a "Double Point Fold". I did a CASE of a card I saw; I was having a hard time getting started. Here is a link to Lisa Curcio's blog Lisa's Stamp Studio. She created a video with great instructions. I am so thankful for all the talented people out there that are so ready to share their talent. Lisa also shares some great ideas on how to watercolor on Whisper White card stock in her video.

I made a card like this in the stamp club that I was a member many years ago. I enjoyed trying it again.


Sunday, February 4, 2018

Four Fold Cards

These cards show my journey at making the four fold card. Some months ago this was my first attempt at making this design. I followed the tutorial that I found HERE. I used the Stampin Up sets called Touches of Texture and Butterfly Basics. It was a challenge but one I enjoyed working on.


For my second card I used designer papers that I had purchased at my local Jo-Ann store. I used basic black for the die cuts. Love how the black looks on the paper.


This last card was one that we did in our Create, Challenge, Encourage Stamp Club for our January meeting. We used the Delightful Daisy stamp set. The card base was basic black with Calypso Coral as the accent layer. The daises were stamped with Calypso Coral and Pacific Point ink. This layout becomes a little time consuming but I think it is well worth the effort.


Tuesday, January 16, 2018

From My Heart

Valentine's Day is less than a month away. I thought that we would make a Valentine card in our class on Saturday. I was also looking for a way to use my new stamp set called "Beautiful Bouquet". This is such a pretty set and I had not had the opportunity to use it. As I was looking on Pintrest for inspiration, I ran across a simple but very pretty card. My card is a CASE of that card that you can see here.

The stems are from the "Beautiful Bouquet" set. The heart stamp is from the set called "Banner Blast". When I stamped the heart, I had a hard time getting it to stamp solid. I just left it. When I was all finished, I went over each heart with my "Wink of Stella" pen. That spread the ink color around just enough that it created a very pretty effect. My accent color was Cherry Cobbler--such a beautiful, rich red.

For my bow, I used some white  twine that had been on clearance and colored it with my "Cherry Cobbler" reinker. That is such a cool way of getting the color needed. It's just a little bit messy. Especially when working the "red".