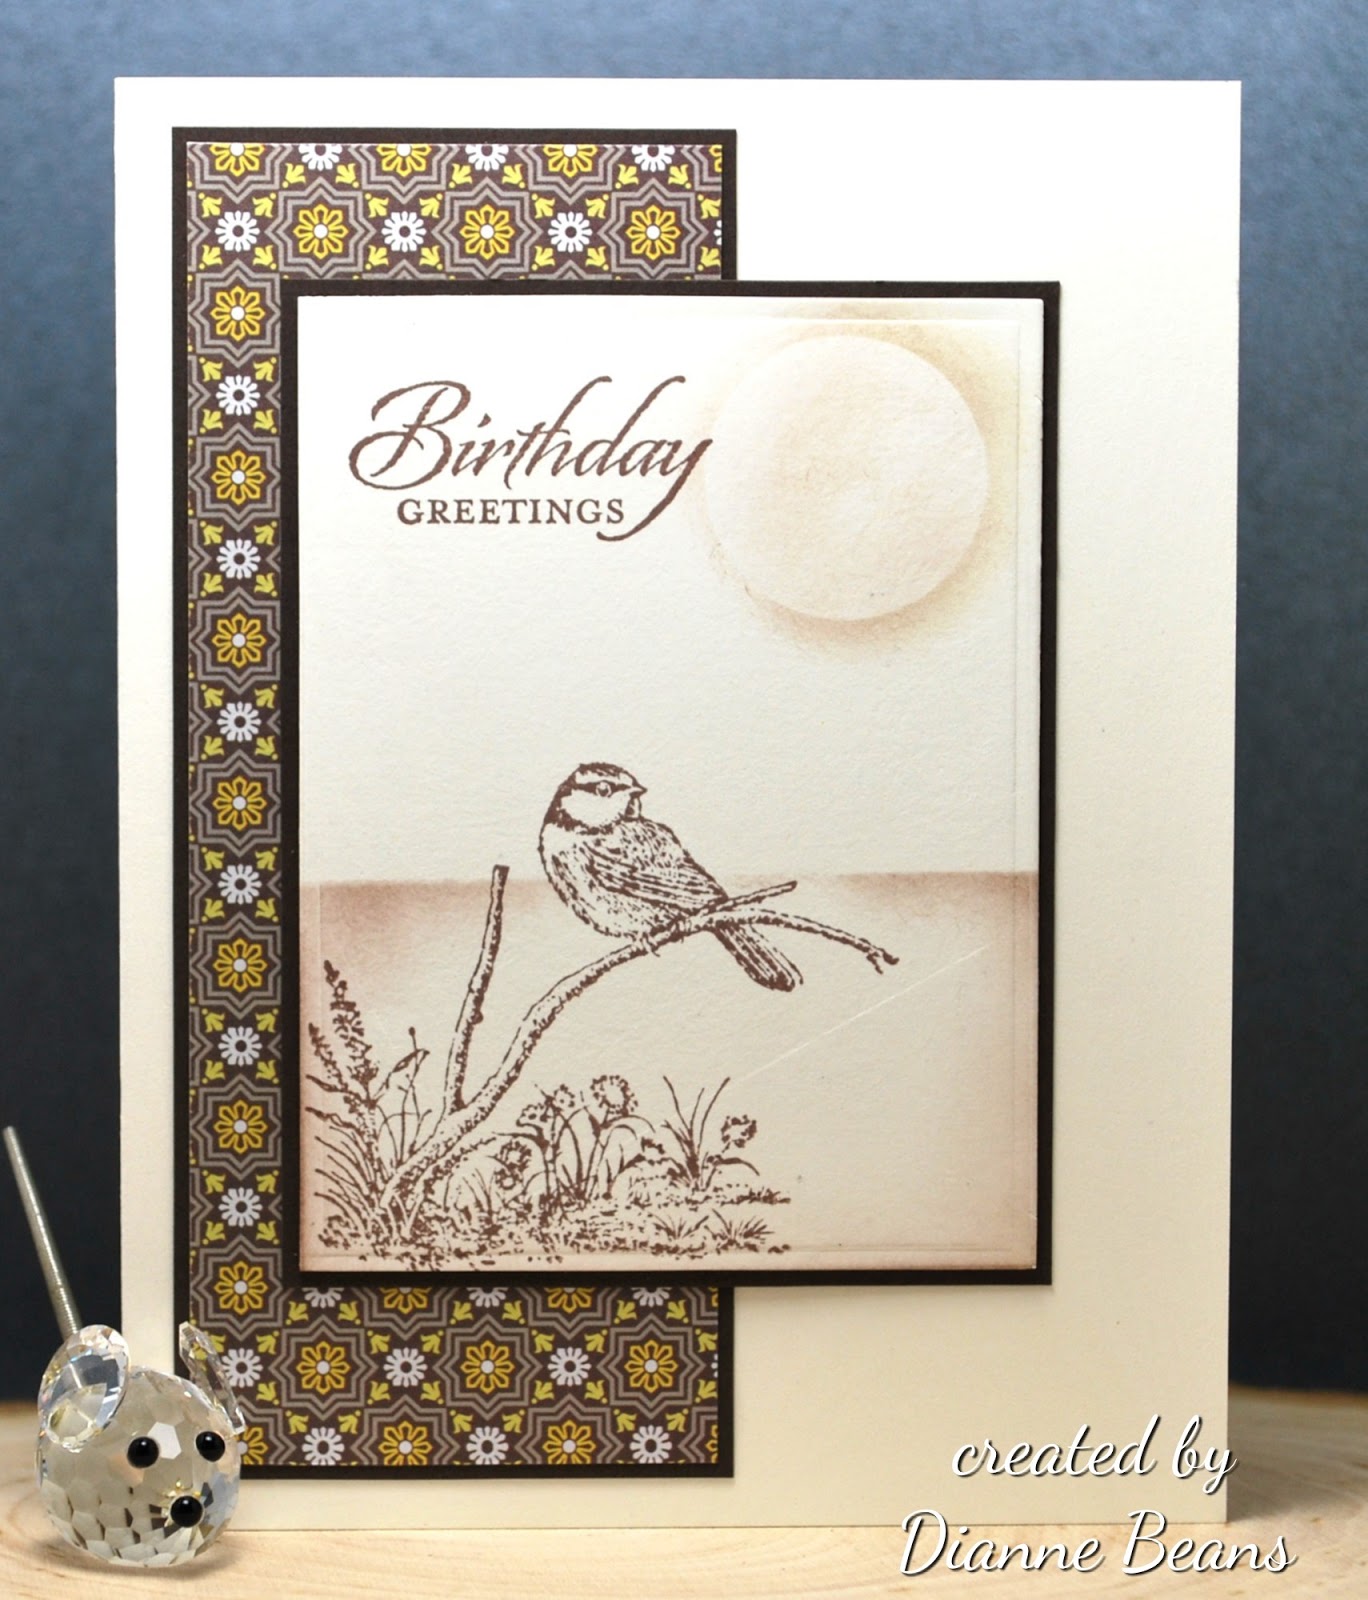
Showing posts with label Sponging. Show all posts

Thursday, September 19, 2019

Amazing

It is amazing to me how a "friend's birthday" can draw us back to our paper crafts.  Yesterday we were celebrating Daan's birthday. Today he turns 80. I looked through my cards but didn't find one that I wanted to use. After looking through my stamp inventory book, I came to SU's "Enjoy Life". This set had the perfect stamps.

You see, Daan has Parkinson's Disease just like my husband. He sometimes has trouble walking because of his freezing. BUT when he gets on a bike, he is free and can ride for miles. Actually, there are a total of four couples that have become very close friends over the last two years. All of our husbands have Parkinson's, but more than that, we all love the Lord. We enjoy being together. We all have similar interests. Yes, our husbands have Parkinson's but that does not define who we are. We all still have an identity. We love doing the things other couple's enjoy doing. It may just take longer for us to accomplish the task. Of course we are each limited from doing certain fun things. Often time, I feel excluded from social events because we have to deal with these certain limitations. These friends understand.

So I want to share my card with all who come to my blog.

Here is a list of the items that I used--
Stamp sets --  Stampin' Up "Enjoy Life" and "Bloom with Hope"
Card stock --  Pacific Point
Ink --  Gina K Designs Black, SU Soft Sky, Brocade Blue and Pacific Point
Accessories --  Make up brush for sponging

For the sponging, I used one of the new make-up brushes that I received as a gift. I was really pleased with the results. I love the softness that the brush creates.


I hope have a beautiful day. Our Michigan weather is perfect today.


Saturday, August 12, 2017

My Latest Quilting Project

I have used this punch very little. I decided it was time to give it a try. I had seen a card similar to this. I had all these paper scraps together for another project. "Why would they not work for a card?"

As you can see, I tried it and they worked. I love the poka dots. I love the soft pastel colors. I love using something from my collection that has not been used very much. I love many of the retired stamp sets. This sentiment was from one of the first stamp sets I purchased "Always In My Thoughts" (2008). It was a perfect fit. I stamped it and punched it out.


Then I needed something for the inside of the card. I could have left it plain, but that didn't appeal to me. As I was looking through my stencils I found one that had little hexagons on it. Perfect!  I added a little bit of color using the stencil and some ink. Now, for me, it was complete.


Thursday, July 13, 2017

By The Sea Shore

When I first saw the "Seasonal Layers" thinlets die set in the new Stampin' Up catalog, I fell in love with it. I began seeing cards with the chair on them. Then one day as I was leaving one of the ladies rooms at church I saw this picture--


At that point I knew that this was a set that would enjoy having and using. The set arrived on Wednesday and this afternoon I made a card with it. I used the picture I had seen as my inspiration.


I created the background first with sponges and ink. Then I added the foliage on the left side. That stamp is from the "Wetlands" set and markers were used to color it before stamping. The chair is from the Stampin' Up "Seasonal Layers" thinlet die set. The sentiment is from one of Our Daily Bread Designs "Mini Tags" set. For the card base I used "Night of Navy" card stock and layered the focal image onto a piece of Brocade Blue card stock before gluing it to the card base.


July 16, 2017 -- This card was mentioned in "Favorites for the week ending July 16, 2017".

Wednesday, June 28, 2017

Stephen Graduates

On June 15, our grandson, Stephen, graduated from Jones College Prep High School in Chicago, Illinois. He finished high school well. This summer he is a life guard at one of the beaches along Lake Michigan there in Chicago. His plans are to go to Marion Military Institute in Marion, Alabama. He reports on August 8. We are proud of what Stephen has accomplished and will be praying for him as he begins this new season of his life. This picture was taken in August of 2016. I haven't been too good at taking pictures the last few times we have been together.


This is the graduation card that I made for him. It is a full sheet of Brocade Blue SU card stock folded in half making the card 5 1/2" x 8 1/2". I think most stamps are made for the smaller A2 size card so it becomes a challenge to make a focal image that looks appropriate on the larger card. 

My inspiration -- Stephen's school colors were blue and white, and the school mascot was "The Eagles". Earlier this week as I was thinking about making his card, the verse of Isaiah 40:31 came to mind. As I looked at some cards on the blog  of "Word Art Wesdnesday", I started to come up with some ideas. I made the inside left panel first, then the front. After the card was together, I had to work at finishing the inside right panel. Finally! it is finished and ready to be mailed.


. . .those who hope in the
LORD will renew their
strength. They will soar
on wings like eagles;
they will run and not
grow weary, they will
walk and not be faint.
Isaiah 40:31 (NIV)


July 3, 2017 
I feel honored that this card was chosen as one of the "Favorites for the week ending July 2" at SplitcoasterStampers.

Monday, June 26, 2017

Pretty Blue Flowers

This was a card I made just because I wanted to. I had been working on cards for my class. There were some things I wanted to try and this is the card I created. I love sponging. It is pretty cool to be able to create a shape onto plain card stock with a mask, ink and sponge dauber. The flower stamp is from the set "Touches of Texture", stamped with Memento Gray Flannel ink and colored with the new watercolor pencils from Stampin' Up.


Sunday, June 25, 2017

Sponging and Masking

These are two of my favorite techniques. That was the topic for our June Create, Challenge, Encourage Stamp class. We made three cards using three different types of sponging and some masking.

This card was made using on oval mask to sponge the colors onto plain white card stock. I used blue and green ink and a large sponge dauber. After the sponging is complete you can add the stamped image and sentiment .


The steps for this second card were a little more involved. I first stamped my images onto plain white card stock and cut into the oval shape using a Spellbinders Nestabilities die. Without removing the paper from the die, I turned it upside down and embossed using my silicone rubber mat. Still leaving the oval in the die, I turned it right side up and lightly sponged over the die onto the card stock. The result is a small white edge to the image which creates the appearance of an additional layer.


I posted this third card a few days ago on the blog. With just a few stokes of ink over some masked lines, I created the illusion of a landscape. Very simple way to add depth to your stamping.


Monday, June 19, 2017

Father's Day 2017

Saturday evening I wanted to make a Father's Day card for my husband. I wanted him to know how much I love him.  He was also a wonderful father to our two children who now have families of their own.

This is the card I made. The stamp is from Stampin' Up's "Moon Lake". It was stamped on a natural card stock with Memento Rich Cocoa ink. The designer paper was from my collection. I was pleased with the way it turned out. Don really liked it also.


This afternoon I was trying to work on some cards for the class I am doing on Saturday. The topic is "sponging and masking". I decided to make the same card but add just a few touches with a sponge and some ink. The sponging gives the image more depth. I like how it turned out. The sentiment on this card is from the Stampin' Up set "Wetlands".


Wednesday, May 17, 2017

Better Late Than Never

I seem to always be running behind these days. It is a challenge to just keep up with "today's" activities. April 30 was my son's birthday. I just got his birthday card in the mail. Daniel grew up by the sea. He loved the water. One of our favorite times was watching the sail boats go by our house. This was not really a birthday card, but I wanted him to know how thankful I am that he is my "son".


I used the stamp set "Swirly Bird" to create the sailboat and a die from the coordinating thinlets to create the waves. Using a large post-it note to mask off the sky, I sponged on Brocade Blue ink and then added Night of Navy ink to the horizon. I then turned the post-it note around to mask/cover the sea and a punched circle to create the sun. A scalloped circle was used to add the illusion of clouds. The sentiment stamp came from the "Sheltering Tree" set.


Mentioned in the "Weekly Favorites for the week ending May 21"

Tuesday, March 7, 2017

Flowers Are Mine

Sometimes I look around my desk and wonder why I don't just throw everything laying around in the wastebasket. Then I make a card with some of those things. That's why I cannot seem to throw away those extra flowers, leaves, die cuts, etc away. This is one of those cards. I needed a card for a special friend. Found the die cut in a small tray on the left side of my desk. The flowers were from the "flower drawer" and the leaves were from a small plastic box of "greenery". Often when I have a small scrap of card stock left, I will punch or die cut a flower or two. If it is green card stock, I will punch or die cut greenery until the scraps are so tiny that I can do nothing else with them. I have found that I like to have different shades of greenery on hand. When I am in the middle of making a card, I don't have to stop and cut the leaves.

I started out making this card with the idea that it would be a sympathy card. I had cut the large circle medallion months ago (from a Spellbinder's die). To keep the colors soft I used the same vanilla card stock that the circle was cut from. From the "flower drawer" I found the parts for the flowers which had been cut from SU island indigo card stock. Some parts had already been sponged with whisper white craft ink. The greenery was already cut. After laying everything out, I sponged a little island indigo ink onto the medallion so that it would show up better. I did not add a sentiment because I knew that I could use the card for many different occasions. 

I love flowers and I love putting them on my cards. I love springtime and I love seeing all the different flowers come to life after a winter of rest. 

"Take a good look at God's Wonders--
They'll take your breath away."
Psalm 66:5 (The Message)


Wednesday, February 22, 2017

February Love Notes

Valentines Day sort of came and then was gone. Don had a neurology appointment that morning in Ann Arbor. In the evening we had our Parkinson's Support Group meeting. There was not much time for us to celebrate the day. On the Sunday evening before, we hosted a Valentine Dinner party. We had fun sharing the evening with friends. I also made a couple of small valentine cards for Don and hid them in some unusual places. He enjoyed finding them.

For the first card I found the "I love you" paper in the scrap box. I had used it before for a Valentine card but I still thought it was a good choice for this card. Added a couple of die cuts and I was done. The card was very simple but it said just what I wanted it to say. For 55 years I have loved this man. In June I will have shared 50 years of my life with him as his wife.


The second card had more stamping on it but still very simple. I used stamps from four different stamp sets. Added some sponging to soften the white card stock. Used two layers of card stock for accent and this card was finished.


day after day  year after year
"You are my sunshine"


Wednesday, January 25, 2017

Foggy Morning

The past week, here in Michigan, we have seen several days with really heavy, dense fog. I was inspired to try to create a foggy scene on a birthday card. I spent most of the morning working on the card. I first started out by stamping the image on white card stock using Memento Tuxedo Black ink. Then I tried sponging over the image with Stampin' Up's Whisper White craft ink. It was working but not like I wanted it to. Next I tried stamping the image on light gray card stock using VisaFine Onyx Black ink. Now it looked like I was on the right track. Finally, I began sponging over the stamped image. I tried to add more sponging in the center of the image to create more depth to the scene. I used Memento Gray Flannel ink to stamp the deer and then did more sponging. Finally I was getting the look that I wanted. I love the finished result.


The stamps used were: "Woodland Wonder" from Penny Black, "Forest Silhouettes" from Sweet 'n Sassy Stamps and the "Happy Birthday" from Stampin' Up's set called "Bloom With Hope". The card base is SU's So Saffron card stock with a small piece of designer paper that I found in the scrap box.


Wednesday, September 23, 2015

SC559

This afternoon, I was able to get a card made for today's SCS sketch challenge.


The card turned out to be a very simple "clean and simple" card. I masked the circle and sponged the upper part of the card stock with Memento Summer Sky ink. The butterflies were stamped in Memento Paris Dusk ink. The butterflies were from two SU sets -- "Papillon Potpourri" and "Butterfly Basics". The scripture verse is from Our Daily Bread Designs set called "Faith".

Wednesday, March 18, 2015

SC532 -- Pretty Hydrangera

My card for today's challenge is not what I started out to do. I guess each part built on the previous part. It took me a while to decide what I was going to use for the focal image. Once the stamp was chosen, I experimented with different colors. The final image was colored with Distress Markers -- tumbled glass, stormy sky, bundled sage and forest moss. I spritzed the stamp with water before stamping. The other panel was created using a background stamp for Impression Obsession. I stamped it twice using SU Always Artichoke and Island Indigo (stamped off once) ink. Then I sponged tumbled glass distress ink lightly over the whole piece. After embossing the white background piece, I lightly sponged tumbled glass ink it as well.


Saturday, July 26, 2014

Inks, Stencil and Dies

I had been doing some research on different ways to use stencils. I came across a blog with wonderful videos regarding stencils and different ways to use Distress Inks. I have a few of the ink pads but have not used them all that much. Here is the link to the blog titled Jennifer McGuire Ink.

 This is a photo of the full piece of paper that I colored. I used three different colors of the Distress Ink -- worn lipstick, tumbled glass and spiced marmalade. I laid a stencil over the paper and sponged over the stencil with water. Before I finished sponging, I sprayed some water on my craft mat, added a pinch of Perfect Pearls powder and sponged that over the stencil.

I took my "Bashful" die and cut the image out in the center of the paper. I cut the same die out of black card stock. I inlaid the cut dies in the opposite pieces of paper.


It this point I began to assemble both cards. For this one I used SU strawberry slush card stock for the base. The next two pictures show the card from different angles.


This card features the die cut from the sponged piece of paper on black card stock accented with a white oval.

This is my cards using inks, a stencil and die cuts.


Monday, April 21, 2014

Lavender Butterflies

For some reason today's CAS challenge took me all day. It was a color challenge so it should not have been that difficult. Using color is one of my favorite ways to create a card. We were given a picture that had six colors and were to use at least three of them on our card.


I sponged a piece of white card stock using Memento inks LuLu Lavender and Summer Sky. I found a scrap of lavender card stock that worked with the sponged piece. I used it to mat a small strip of white card stock and I also used it to stamp three butterflies using the Stampin Up's stamp set "Papillon Potourri" with Memento Grape Jelly ink. The greeting came from Stampin' Up's hostess set "Express Yourself" and was accented with an enamel dot from Recollections purchased at Michael's.

My prayer is that you will have a great week!

Tuesday, November 13, 2012

I Love the "Garden Collage" Stamp Set

What a beautiful stamp set. It often gets hidden and then when it comes out-------  It makes such beautiful cards. Here is one that I made a couple of weeks ago. I stamped the images on white card stock, found the base already cut and the orange piece was in my scrap  box. I sponged Tea Dye distress ink around the images. The background seemed too bright so I used one of my background stamps from Impression Obsession with Memento Rich Cocoa ink. Wow! What a change. The small image is popped up with dimensionals and organza ribbon finishes the card.


Wednesday, July 4, 2012

Technique--Sponging


The sponging technique fascinates me. I love how simple it is and yet so elegant. With just a little ink and some type of sponge, you can change the basic cardstock in just a matter of minutes. These two cards are a result of watching a video on StampTV and following the blog of Heather Telford. I used Memento Ink colors: Summer Sky, Bahama Blue, Danube Blue and Tuxedo Black.
On this card I used Hero Arts stamp--Exotic Bloom. I had to add the butterfly to cover up an ink spot from my finger.

For this card I used stamps from SU Fabulous Florets.

Tuesday, June 19, 2012

CHF Challenge # 3--Pearls and Lace

It is time for the third Cornish Heritage Farms Challenge. The theme for this challenge is "Pearls and Lace" and our hostess is Cindy Haffner. Hope you will be able to play along. For all the details go to the Cornish Heritage Farms Blog.

Now I would like to share the cards I made for this challenge. My card uses the digital image from the Cornish Heritage Farms website called Lily Digital Stamp. It was printed, cut out using a Nestibilities Oval and sponged with Memento Black Ink before removing the image from the cutting die. I found the lace in my sewing cabinet, added some black ribbon over the top edge and finished it off the self-sticking pearls.

Of course, I had to make a second card using different colors. I recolored the image to match  the SU color Rose Red before printing it out. I then sponged SU Rose Red ink around the edges before removing it out of the die. The card stock (SU Rose Red) was dry embossed on about two-thirds of the front panel. Again I covered the top edge of the lace with ribbon and added self-sticking pearls. I hope you enjoy our third challenge.

Thursday, May 3, 2012

CAS Today

It has really warmed up here in Michigan today. Time to get some yard work done. But there is still time to stamp. Right. Here is my next card to share with you. Very Simple. I sponged the diamond with Memento Desert Sand and stamped the image with Memento Rich Cocoa. I love the CAS look. The stamp is from Hero Arts and is called "Exotic Bloom".


Tuesday, April 24, 2012

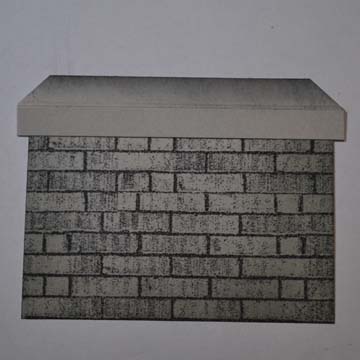
Making A Brick Wall

Many have asked me about making the top for the brick wall on my card. There are several steps but it is very easy. I used a light gray card stock. I stamped the brick wall using Memento Tuxedo Black Ink (my favorite).

I decided how big I wanted the brick wall and trimmed my paper to that size. I cut mine 2½ inches tall and 3¾ inches wide. I then sponged on some Memento London Fog ink to darken the brick a little.
Now for the top. Cut a stripe of the gary card stock 3/4 inch wide. Score down the length of card stock at 3/8 inch. I used my score buddy because it has the small increments. Fold in half with the ridge side on the outside.
Now you have to decide how much you want your top to hang over the edge of the brick. In my sample here I allowed for 1/8 inch on each side. Next you want to trim the ends. I used my quilting ruler to trim each end at a 45 degree angle. (You only trim half the width of the stripe.)
Now sponge on some black ink to create the illusion of a shadow—darker on the back edge and lighter towards the center of the strip. Now attach the top to the brick wall and finish your card.

I would love to hear how yours turns out.