.
Wednesday, December 30, 2015
Additional Christmas Cards
I started this post last week, but didn't get it finished. I have a couple more Christmas cards to share with you. Posting to my blog is a way of keeping track of the cards that I made for this season.
.
.
Tuesday, December 29, 2015
Tiny Cards
During the holiday season, I needed several cards for different events. I ended up making "little" cards. They were 3 x 3-inches. So much fun. I was able to make the envelopes using the We R Memory Keepers envelop punch board. What a great tool.
Also made gift tags which were a little smaller than the cards.
Tuesday, December 22, 2015
Christmas Greetings to Family and Friends
This is my online Christmas card to all my Family and Friends. May you be blessed this holiday season.
Monday, December 21, 2015
December Birthdays
My husband has a December birthday along with other friends and relatives. Sometimes making birthday cards can get lost in all the Christmas preparations. This year I wanted it to be different. I started early but ended up working on the cards at the last minute.
This is the birthday card for my husband. We had a small sail boat once, many, many years ago. The kids still like to reminiscence about some of the scary adventures we had. Mom was very happy when it was gone. I used a retired Stampin' Up stamp called "Sail Away". I stamped the image with VersaFine Black Onyx ink and embossed it using clear embossing powder. I then masked the sails and sponged on a little color to enhance the image. We lived by the sea for a number of years on Bonaire, in the Netherlands Antilles. We never tired of the beauty the sea offered. This boat reminds me of the banana boats that came from Venezuela loaded with all kinds of fresh fruits and vegetables.
This is the other birthday card that I made and it will be put in the mail today. The card base was SU Crumb Cake card stock. Midnight Muse and Gumball Green were the other colors that were used. The stamps were from JustRite which coordinates with Spellbinders Label 18. The Z-fold was used--really fun to make.
Wednesday, December 16, 2015
Christmas Cards
For these cards I used the Heartfelt Creations stamps from the Sparkling Poinsettia sets. These are beautiful stamps and create lovely cards. The three cards below are all similar but different. I was doing a class last Saturday, December 12, and I wanted to show how you can make similar cards without making them exactly the same.
Tuesday, December 15, 2015
Boxes
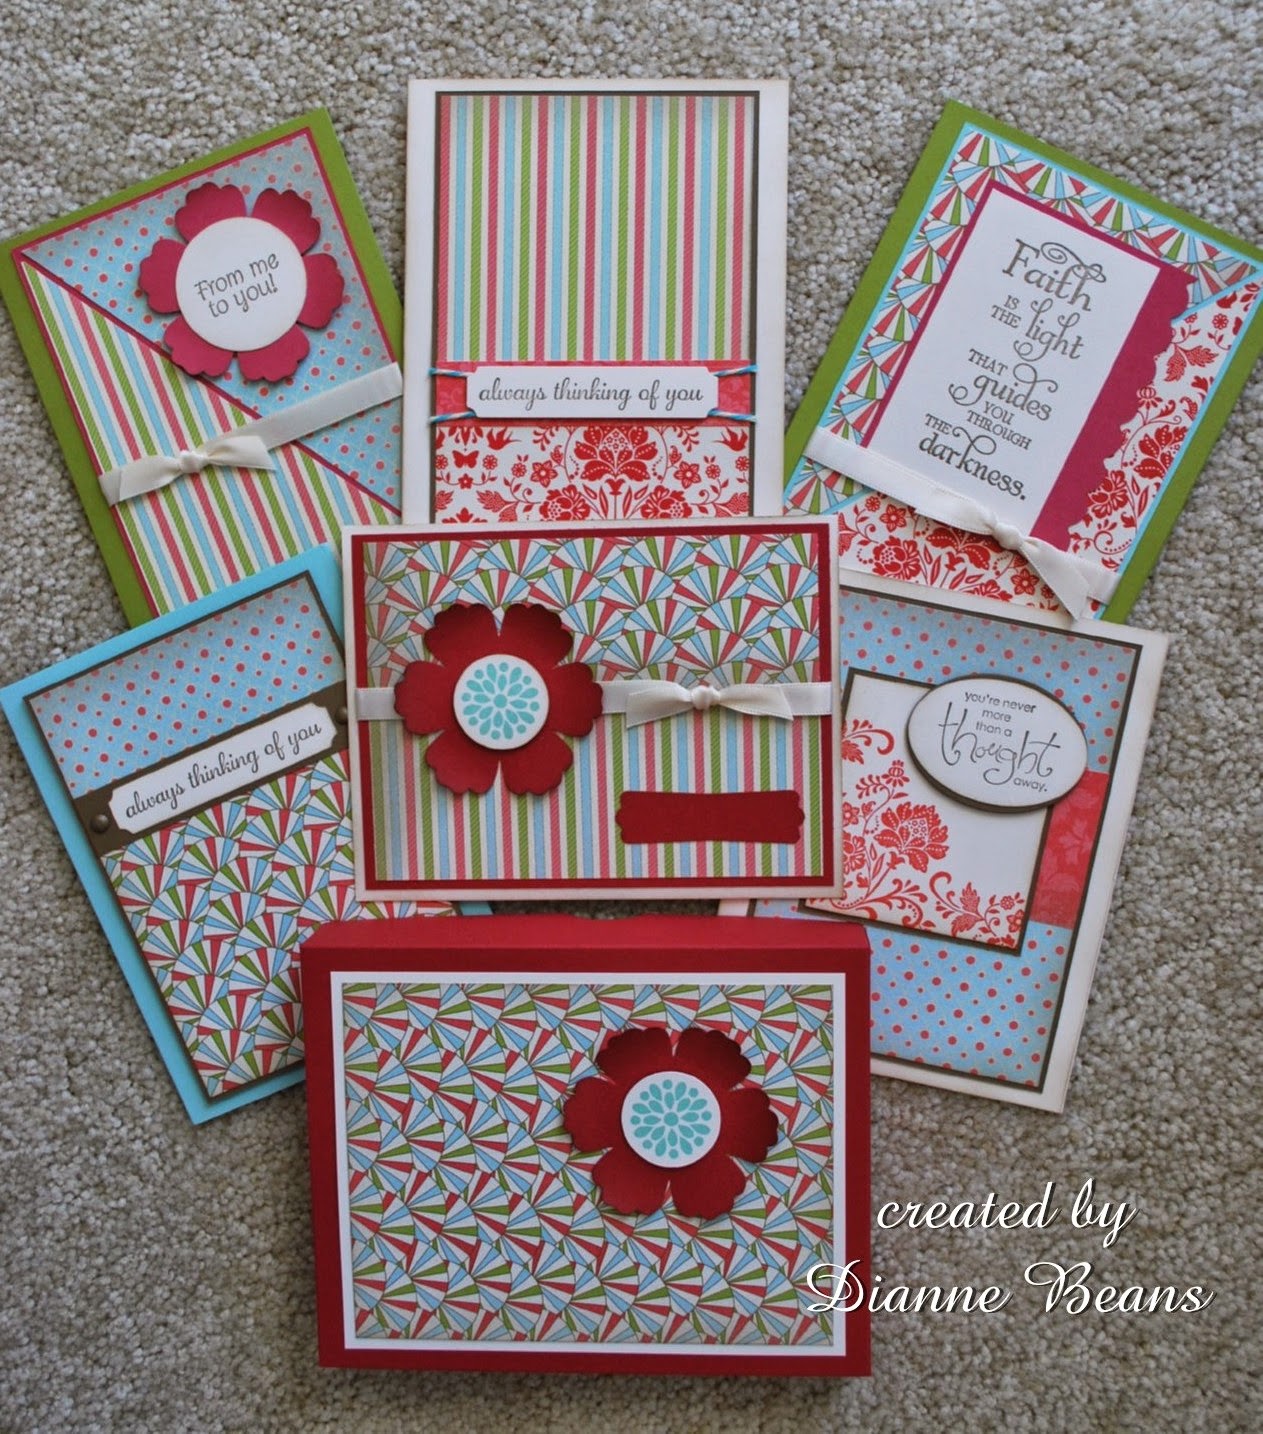
Love doing gift boxes for my cards. Here are some that I have done during the past few months. In this first picture, the box is at the bottom of the picture. It was filled with six coordinating cards.
In this picture, the box is in the center and is surrounded by six cards. I used the same stamp on each card.
In this picture, the box is in the center and is surrounded by six cards. I used the same stamp on each card.
The last two pictures show the tops of two other boxes.
Sunday, November 22, 2015
Poinsettia on Vellum
Experimenting--
That's always fun, especially when the projects turn out the way you were wanting them to. I used the Heartfelt Creations Sparkling Poinsettia set again. This time I stamped the flowers on Chartham Translucent Clear Vellum, 36# weight, which I had purchased from Marco's Paper.The flowers were stamped using VersaMark ink and heat embossed using white detail embossing powder. SU Soft Sky ink was sponged on the backs of the flower layers and the leaves were sponged with SU Always Artichoke ink, again on the back. I love the icy effect of this method. The background paper was created by applying ink (SU Soft Sky) to the inside of the embossing folder, adding the white card stock and running it through the Big Shot. The card base was SU's Soft Sky card stock.
11/29/2015
This card was mentioned as a Weekly Favorite at Splitcoast Stampers
Saturday, November 21, 2015
More Sparkling Poinsettia Creations
I want to post more cards that I have made using the Heartfelt Creations Sparkling Poinsettia stamp sets and matching dies. Once I got started it has been hard to stop. I just keep getting ideas that I want to try.
This first card was made using the Sparkling Poinsettia Candle set. The image was stamped on watercolor paper using VersaFine Black Onyx ink and heat embossed with clear detailed embossing powder. I used ink from distress markers and my aqua brush. Crystal glitter was added to the top of the candle and the flower petals.
The sentiment on the next card is from the Sparkling Poinsettia Swirl set, stamped and heat embossed with gold powder onto a SU top note die. The poinsettia was stamped on red card stock with black ink, die cut and sponged with white craft ink around the edges. Encore gold ink was used to color the berries. The card base was stamped with a Impression Obsession background stamp with VersaMark ink, brushed with silver perfect pearls and spritzed with water to activate the binder in the Perfect Pearls.
The next two cards used a stamp from the Poinsettia Swirl set and circle Nestabilities.
This first card was made using the Sparkling Poinsettia Candle set. The image was stamped on watercolor paper using VersaFine Black Onyx ink and heat embossed with clear detailed embossing powder. I used ink from distress markers and my aqua brush. Crystal glitter was added to the top of the candle and the flower petals.
The next two cards used a stamp from the Poinsettia Swirl set and circle Nestabilities.
This is a tri-fold card. The card base is SU Soft Sky card stock with designer paper from my scrap box. The poinsettia parts were stamp on white card stock and embossed with silver powder. The petals were sponged with SU Soft Sky ink and gentle shaped before gluing together. The center berries were sponged with SU Always Artichoke ink, shaped and glued to the flower center. For the ribbon I used white "Hug Snug" rayon seam binding. I moistened the binding with water and used a couple of drops of Soft Sky reinker to add color. I left the binding crunched up to dry. Love the result.
The inside--
Wednesday, November 18, 2015
Sparkling Poinsettia by Heartfelt Creations
I have been making some cards using stamps by Heartfelt Creations "Sparkling Poinsettia" set. There are also some coordinating dies that go with two of the stamp sets.
For the first card, I made a tri-shutter fold card.
The poinsettia was stamped on white card stock with VersaMark ink and heat embossed with silver powder. Before cutting the images out with the coordinating dies, I sponged the flower petals with "worn lipstick" distress ink. For the leaves, I used a yellow distress ink and SU Old Olive ink. The flower centers were sponged with SU Always Artichoke ink.
The card base was cut from a sheet of 12 x 12-inch SU Old Olive card stock. Some papers were from my scrap box and others came from a 6 x 6-inch pad by Graphic 45.
Wednesday, November 4, 2015
SC565--First Christmas Card
WOW! It seems like such a long time since I made a card for the Sketch Challenge at SCS. Today I was determined to get a card made. I told myself that the leaves would still be waiting for me in the afternoon.
This was a very simple layout so I decided to let the paper do the talking. The center, dotted piece was from a new 6x6-inch Graphic 45 pad that I got last week. The other piece came from a large pad of Christmas paper that I have had for many, many years. The pad is called "The Christmas ULTIMATE Stack". Not sure if all the paper will ever be used. The "Merry Christmas" greeting is from the "Christmas Mini" set by Our Daily Bread Designs. It was stamped with VersaMark ink and embossed with gold powder, which was the very first embossing powder I ever bought. I used a die for the leaves and the Martha Stewart hydrangea punch for the flowers.
This was a very simple layout so I decided to let the paper do the talking. The center, dotted piece was from a new 6x6-inch Graphic 45 pad that I got last week. The other piece came from a large pad of Christmas paper that I have had for many, many years. The pad is called "The Christmas ULTIMATE Stack". Not sure if all the paper will ever be used. The "Merry Christmas" greeting is from the "Christmas Mini" set by Our Daily Bread Designs. It was stamped with VersaMark ink and embossed with gold powder, which was the very first embossing powder I ever bought. I used a die for the leaves and the Martha Stewart hydrangea punch for the flowers.
Saturday, October 31, 2015
Birthday Card
I needed two birthday cards this past week. I CASE'D a beautiful card I found on Pinterest. Here is the link to that card on the blog King's On Paddington. There are many beautiful cards on this blog.
I used SU Primrose Petals card stock and ink. The butterflies were stamped on vellum and embossed with white detail embossing powder.The stamps are from SU sets "Flower Shop" and "Papillon Potpourri".
Wednesday, October 28, 2015
Halloween Cards 2015
About a month ago, I had to take a break from my card making. I was getting overwhelmed and burned out. I have been doing some quilting, and then my husband and I took a vacation. We went to Tennessee. We met my cousin and her husband in Pigeon Forge for the weekend. Faye and I had a chance to go to the Smoky Mountain Rubber Stamp and Scrapbook Getaway. The Show was small but that didn't stop us from having a good time. Then we went to Tullahoma to visit my brother and his wife. We also had a chance to visit with other family members.
Today I made a couple of Halloween cards. They were actually CASE'D from cards that I had seen on Pinterest.
Today I made a couple of Halloween cards. They were actually CASE'D from cards that I had seen on Pinterest.
The first card--
I printed the inside message on my computer--
The second card
Wednesday, September 23, 2015
SC559
This afternoon, I was able to get a card made for today's SCS sketch challenge.

The card turned out to be a very simple "clean and simple" card. I masked the circle and sponged the upper part of the card stock with Memento Summer Sky ink. The butterflies were stamped in Memento Paris Dusk ink. The butterflies were from two SU sets -- "Papillon Potpourri" and "Butterfly Basics". The scripture verse is from Our Daily Bread Designs set called "Faith".

The card turned out to be a very simple "clean and simple" card. I masked the circle and sponged the upper part of the card stock with Memento Summer Sky ink. The butterflies were stamped in Memento Paris Dusk ink. The butterflies were from two SU sets -- "Papillon Potpourri" and "Butterfly Basics". The scripture verse is from Our Daily Bread Designs set called "Faith".
Wednesday, September 9, 2015
SC557
I guess today, I would have to say -- "Third time is the charm." That's how many times I made the focal image/layer for today's sketch challenge at Splitcoast Stampers.
My First Card!
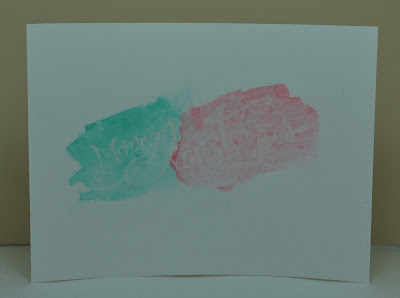
I stamped the greeting on watercolor paper and embossed it using silver embossing powder. I then tried using a watercolor wash over the sentiment. Not sure why, but I just did not like the way it turned out. The greeting did not show up like I wanted it to.
Second try!
Even worse! I used clear embossing powder on the sentiment. Added the watercolor wash (lighter this time) to the paper, The sentiment did not show up at all. It was all wrong.
The Third Time!
I stamped the image on the same watercolor paper with VersaFine Black Onyx ink and used clear embossing powder to create the image. I used the same colors of watercolors but made the color wash much lighter. This one worked! I framed the panel with black card stock and used SU Costal Cabana card stock for the base.
Wednesday, September 2, 2015
SC556
Finally found time to make a thank you card using today's sketch challenge at Splitcoast Stampers.
Stamps used -- Leaves from SU's " Crazy About You", flower from SU"s "Secret Garden" and sentiment from Unity Stamp Co.'s set called "Butterflies and Sunbeams".
Stamps used -- Leaves from SU's " Crazy About You", flower from SU"s "Secret Garden" and sentiment from Unity Stamp Co.'s set called "Butterflies and Sunbeams".
Wednesday, August 19, 2015
SC554
I am actually getting my card posted today for this week's sketch challenge at SCS. It was a rather simply sketch but it took me a while to get started.
I used a stamp from the set called "Insightful Meadows" by the Unity Stamp Co. I used VersaMark ink and heat embossed the image with clear embossing powder. I sponged distress ink over the embossed image. Love this technique which is called "Emboss Resist".I then used a stencil to add the texture. I found the deep rose card stock in my scrap box and used an embossing folder to create the design. I did not add a sentiment; that can be added later if I decide I need one. The card base was done with SU's Pretty in Pink.
I used a stamp from the set called "Insightful Meadows" by the Unity Stamp Co. I used VersaMark ink and heat embossed the image with clear embossing powder. I sponged distress ink over the embossed image. Love this technique which is called "Emboss Resist".I then used a stencil to add the texture. I found the deep rose card stock in my scrap box and used an embossing folder to create the design. I did not add a sentiment; that can be added later if I decide I need one. The card base was done with SU's Pretty in Pink.
Subscribe to:
Posts (Atom)


